
ShotPro
Documentation
Navigation
Rotation - is accomplished by standard two finger touch and rotation motion.
Zoom - is accomplished by standard two finger touch and pinch motion.
Pan - is accomplished by standard one finger swipe in the direction of the pan.
Tilt - is accomplished by two finger up and down motion.
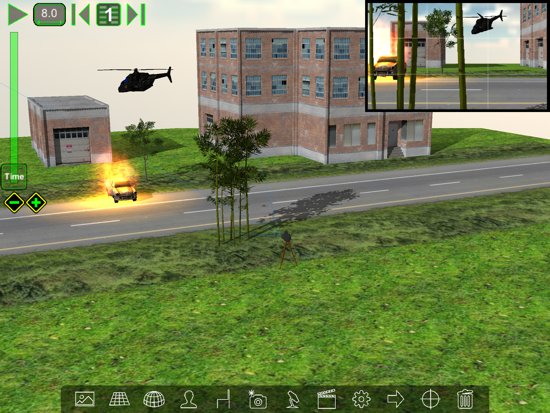
Stage View Overview
This is were you create each individual scene. It contains the upper menu, the Viewfinder, the lower menu and the active work area.
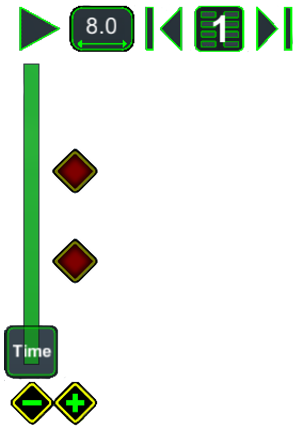
Upper Menu
This is were you create each individual scene. It contains the upper menu, the Viewfinder, the lower menu and the active work area.
Stage View


Previous
Scene


Scenes
View
Play
Keyframes
Add/Delete
Timeline
Slider


Duration
Slider
Next
Scene
Keyframes
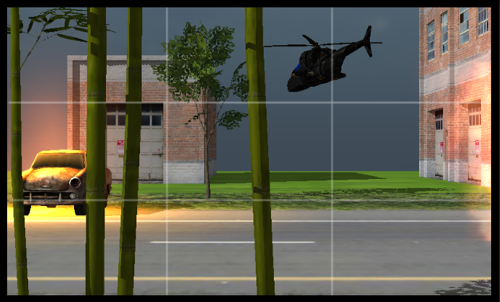
Viewfinder
You can reposition and resize the viefinder.

Resize the Viefinder by tapping on it.


Lower Menu
This is were you create each individual scene. It contains the upper menu, the Viewfinder, the lower menu and the active work area.

Backgrounds

Grounds

Actors
Ambience

Props

Camera & Lights

Audio


Notes


Settings
Focus
Delete

Backgrounds - include preloaded images and the ability to import your own images from the camera roll by clicking the My Photos icon. You can also use your camera to take pictures by clicking the Camera icon. After you have imported your own images or used the camera a new icon will appear on the left side of the scrolling images showing your new image with red X on it. Your can delete this image if you do not need it by clicking on the red X. You can adjust the size and elevation of the background in the scene with the sliders on the left of the backgrounds menu.

Grounds - include preloaded images including grids calibrated to feet or meters.

Ambience - includes RGB sliders for adjusting overall lighting, 12 presets, snow, rain, smoke, daylight, cloudy and night sky activation buttons, and a sun with shadow control.

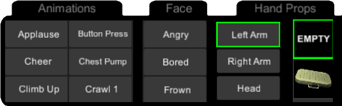
Actors - choose your actors from scrolling menu. The actors with the HD text in the icon are generally higher resolution and contain the ability to adjust facial expressions. You can control head and arm by activating them in the pose submenu and then using the icons in the stage view to position them.

Props - many preloaded props included. Control placement, rotation, and elevation.
Cameras & Lighting - add cameras and lights to the stage. Camera adjustments include elevation, rotation, x and z position, zoom with lens size indicator, tilt control and depth of field distance and size.

Audio - record your own audio per scene using the iPad microphone. The audio record feature is not available on iPad mini first generation and iPad 2 devices. To hear the audio playback press the play button at the top left.
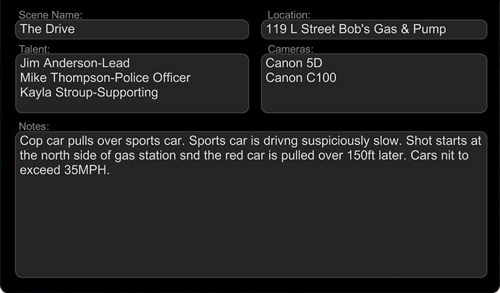
Scene Notes - input all the critical data about your scene, like actors names, cameras used, location, and any other scene info. All of your text becomes searchable in the search field.
Next Selection - hitting this icon toggles the selected item and places it as the focus item. Useful when the field is crowded.
Delete - deletes the selected item.
Keyframing
actors and props can be animated with the use of keframes. To use keyframes, position your subject and press the add keframe button. To remove keyframe, tap on it to highlight the keyframe, then press the delete keyframe button. You can also move the keyframe by first selecting it and then use the time slider to move the keyframe in time. To deselect the keyframe just tap on it.
Search
any word input in the search field will display any scene with the same word input in the notes section
Scenes View
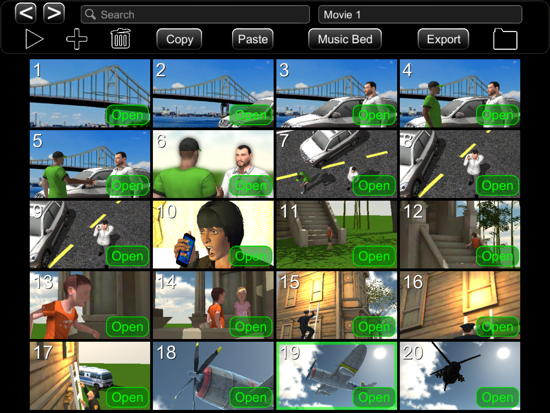

Move Scene forward


Move Scene back
Add
Scene
Delete
Search
Copy
Paste
Music
Bed
Project
Name

Export
Movie
Load
Project

Individual
Scenes

Open a Scene & go to Stage View
Music Bed
preloaded music loops that can be previewed in Scenes View. They will be exported in the final video. Volume slider adjusts level.
Play Pjt
Activates playback mode for the whole project. You can scrub and pause.
Copy, Paste, Delete
Copies, pastes or deletes the selected scene.
Export View
Load Project
Settings - Contains the Draft and HQ mode buttons. Some older devices may perform better in Draft mode. Final video export will be in HQ mode even if Draft is selected. Also contains support links and localization language support.
Sharing Projects
FAQs & Tips

Next


Focus - hitting this icon places the selected item into the center of the screen.
Inspector
When you select a prop, camera, light, or actor an inspector menu items will appear.


Move along x axis.
Move along z axis.
Rotate object.
Elevate object
Tilt Camera
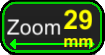
Zoom Camera
Scale object.
Actor submenu
contains more
control options
Depth of Field Size sets the thickness of the area in focus
Depth of Field Distance
To share your project first plug your iPhone or iPad into your computer and open up iTunes. Select your device in the upper left part of the iTunes window. Then select Apps on the left side of iTunes. In the file sharing section find the ShotPro app and select it. ShotPro documents will appear on the right. Select the document you want to share and click the Save to… button. You can also import other ShotPro projects using this window by clicking the Add… button.